HOSFU GEN4 / An illustrated guide
A small movement. Feedback you can follow.
Squeeze, hold, relax. The instructions sound simple. Knowing what you just did can take practice. Here is how Gen4 brings pressure feedback into that process, from your first seat to your first course.
See how it worksFor adult beginners · Gen4 setup and use
01 / The pressure signal
What is a pelvic floor trainer?
A pelvic floor trainer is an aid used while practising pelvic floor muscle exercises, often called Kegels. Gen4 is an external, sit-on trainer for adults. You practise through clothing while its central airbag senses pressure changes. In Professional Mode, those changes are sent to the HOSFU app over Bluetooth.
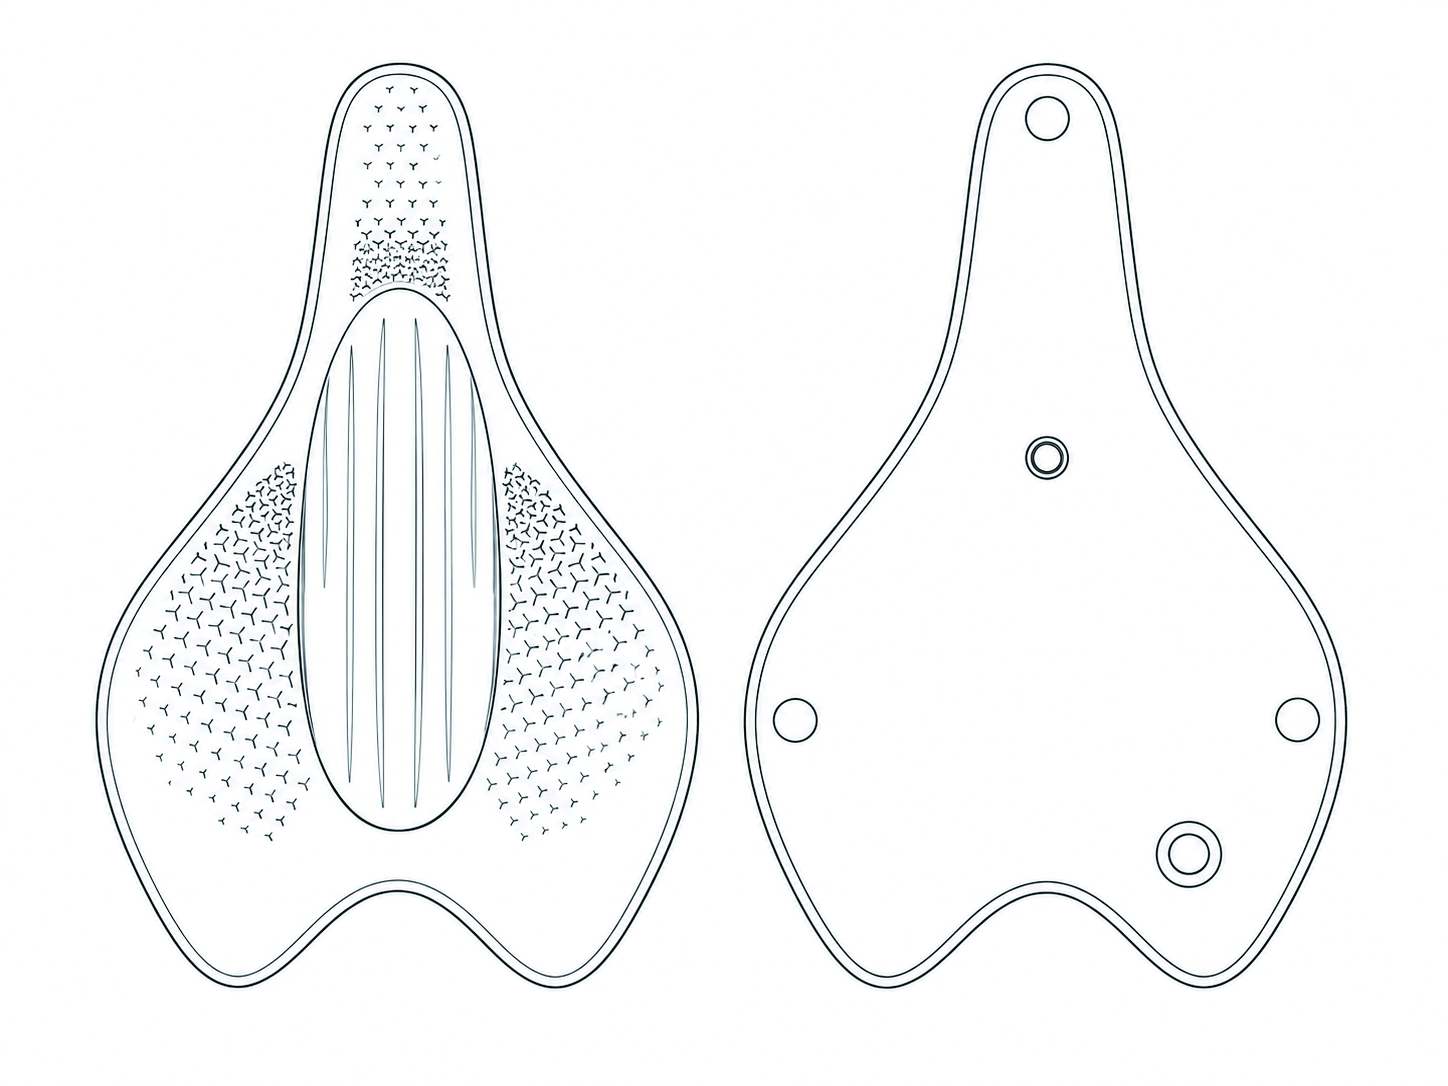
- 1Central airbag
- 2Inflation / deflation
- 3Power
The shape gives you a place to start.
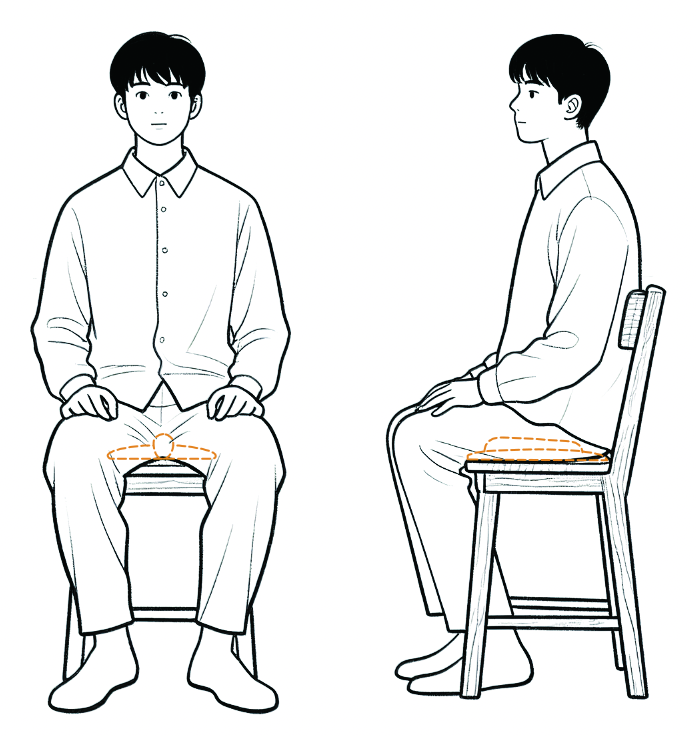
Place the narrow end between your thighs, as you would on a bicycle saddle. The airbag sits beneath the perineal area. Get comfortable and steady before you start a course.
- 1
You make the movement
Gently squeeze, hold and release your pelvic floor muscles while breathing normally.
- 2
The airbag senses pressure
The sensor collects changes at the seat contact area.
- 3
The app shows the changes
Follow the course and watch the pressure feedback as you practise.
A pressure trace is a training cue. Movement and position can affect it, so it cannot by itself confirm correct technique or diagnose muscle strength.
02 / Two modes
Choose what you want to do first.
Gen4 has two separate starting paths. The light tells you which one you have entered.
Quick Mode
Quick Comfort is a separate vibration and warmth session: no app, calibration or active contractions are required. Restart the device to change modes.
- Hold Power for 2 seconds. Wait for the white breathing light.
- Leave the app closed. Press Power twice.
- A steady orange light confirms Quick Mode.
Stops automatically after 3 minutes. App connection and calibration are not required.
Professional Mode
For active, guided training with pressure feedback. You perform the contractions and follow the app course.
- Power on before sitting down; open Bluetooth and the HOSFU app.
- Wait for steady blue, then sit and select a program.
- Complete that program’s calibration before training.
Training vibration feedback starts after successful calibration. Bluetooth mode shuts down after 15 minutes without operation.
Changing modes? Switch off first, then turn on again and choose your next mode. They do not switch directly into each other.
03 / Your first setup
How to use your pelvic floor trainer, in order.
For your first app session, the order matters. Connect before sitting down; calibrate after you have chosen a program.
Watch the setup video- 01
Prepare the seat and airbag
Use a flat, stable, firm chair. The manual specifies holding the inflation button for 2–3 seconds to fill the airbag before use. Use the trainer through clothing.
- 02
Connect before you sit
Hold Power for 2 seconds. With the white breathing light on, enable phone Bluetooth and open HOSFU. Wait for the device’s steady blue light.
White: waitingBlue: connected - 03
Sit comfortably. Choose a course.
Keep the narrow end between your thighs and the central airbag under the perineal area. Put your feet flat on the floor. Start with a basic course in the app.
- 04
Calibrate, then practise
Inside the selected program, tap Calibrate or Reset and follow its prompts. Keep your position steady. Once complete, follow the squeeze, hold and relax cues. Let go fully between contractions.
Professional training vibration begins after calibration succeeds.
04 / Reading feedback
Make room for the release.
It is easy to focus on the squeeze and rush the rest. Release is part of every repetition. Choose a stage below to see where it belongs in the movement.
Calibration establishes a starting point for your current position and airbag state. If you shift substantially, move the device or change the airbag, recalibrate before continuing.
One repetition, illustrated
Think of a gentle inward, upward lift. Keep breathing; avoid pushing your body down into the seat.
The moments that cause confusion
Before you try harder, check the setup.
Small setup details can explain an unexpected light or missing vibration.
The light is orange. Why won’t the app connect?
You are in Quick Mode. Turn the device off and on again, then open the app while the white light is breathing. Wait for steady blue before sitting down.
I connected the app. Why is there no training vibration?
Select a program and complete its calibration first. The manual states that Professional Mode’s training vibration feedback starts only after calibration succeeds.
Should I aim for the tallest curve?
Focus on controlled movement and complete relaxation. Pressing your body into the seat can also affect pressure. If feedback seems wrong, check your position and recalibrate rather than pushing harder.
What comes after the basic course?
The manual suggests learning the basic course first, then exploring physical feedback. Game training and custom contraction, hold and rest patterns can follow once you are familiar with the movement.